WE'VE MOVED!! You can now find us at Sunshine and Spoons!

Showing posts with label how to. Show all posts

Friday, December 5, 2014

Pie Crust Cookies or How to Use Up Extra Pie Dough

The one problem I have with making pie is that I always end up with extra pie dough.  I hate throwing food away so I came up with a way to use it up.

Roll the extra dough out just like you would for a pie crust.  Use a cookie cutter to cut shapes out of the dough.  Re-roll as necessary until you've used it up.

How to use up extra pie dough

Lay the cutout shapes on a cookie sheet (I line mine with parchment paper) and brush with melted butter.  Sprinkle the cookies liberally with cinnamon sugar.  Sometimes, I skip the melted butter because I'm lazy and they still turn out delicious!
 
How to use up extra pie dough

Pop the cookies in the oven for 5-10 minutes or until golden.  Watch them closely because they'll burn fast!

How to use up extra pie dough
Star's baby doll helped me watch the cookies while they baked

Enjoy!
 
How to use up extra pie dough


Thank you for stopping by my blog! I appreciate each of my readers and would love to connect with you on Facebook and Instagram! 

Saturday, February 8, 2014

2013 Freebie Recap

Do you like getting stuff for free?  I know I do!  Here's a recap of everything I got for free in 2013 and how I got it so you can get something for free too.  And if you're interested in seeing what I got for free in 2012, here's my 2012 Freebie Recap.


I used various websites to earn Amazon gift cards online.  Here's what I bought using my gift cards in 2013:
  • 10.1 Samsung Galaxy Tab 2 ($349.00)
  • Protective case for the tablet ($13.99)
  • Masking tape, foam sheets, glitter glue, and contact paper for a project to do with the kids ($21.50)
  • Hamilton Beach single serve coffee maker for a Christmas gift for Hubby ($49.00)
  • 18 K-cups for the new coffee maker ($15.99)
  • Several apps for the new tablet ($10)
That brings me to a grand total of $459.48 in free products.  That doesn't include a few things I bought on Amazon and paid for partially with gift cards.  Here's how I earned that money: 


Swagbucks: Earn points that can be redeemed for Amazon gift cards along with many other rewards by using the Swagbucks search engine, completing the daily tasks, watching Swagbucks tv, shopping online through Swagbucks at participating websites, and completing special offers and surveys.  You can sign up for Swagbucks here


MyPoints: Earn points that can be redeemed for Amazon gift cards along with many other rewards by clicking through on the daily emails they send, completing surveys, shopping online through MyPoints at participating websites, using the MyPoints search engine, playing games at MyPoints games (which earn points on MyPoints PLUS rewards points on the game site which can also be turned in for Amazon gift cards making that a double win!), and completing simple offers in the "Easy Points" tab.  Invites are by email only so send me an email at annaliesbabyboutique@yahoo.com if you'd like to join.
 

Listia: Earn credits which you can use to win Amazon gift cards (or just about anything else!) in auctions put up by other members of the site by sharing auctions from the site on Facebook and selling stuff you don't want anymore in your own auctions.  You can sign up for Listia here.    


Bing Rewards: Earn points that can be redeemed for Amazon gift cards along with other rewards using the Bing search engine and clicking on a daily offer.  You can sign up for Bing Rewards here


Ebates: Earn Paypal cash (or opt to have the site send you a check in the mail) by shopping online through Ebates at participating websites. You can sign up for Ebates here.


For smartphones and tablets only:


Appnana: Earn "Nanas" by checking into the app daily and installing and opening new apps on your device.  I wait until the Nanas credit to my account. and then I delete the new app from my tablet.  The Nanas can be used to purchased Amazon gift cards, Google play gift cards, Itunes gift cards, Paypal cash, and several other rewards.  Install the app on your device for free and use the code "a753486" for an additional 2500 Nanas.


 Viggle: Earn points by "checking in" to tv shows on your smartphone or tablet.  Some shows are worth extra points plus sometimes there are fun little quizes to play along with the show that earn you extra points.  The rewards change periodically, but I'm waiting until they offer Amazon gift cards again to cash in my points.  You can download the app for free. Send me an email at annaliesbabyboutique@yahoo.com if you'd like to join with my referral link to get an extra 1000 points! 


*Note: When I'm shopping online, I either get free shipping or a percentage off my order by searching for coupon codes at sites like retailmenot.com and coupons.com.  NEVER pay full price when shopping at a big name store online.  Combine those savings with cashback through one of the sites mentioned above and possibly rewards points on your credit card and you can save a lot of money!


Friday, January 24, 2014

Tips for Taming the Laundry Monster

I've often said (especially since having children) that laundry is the bane of my existence.  It's my least favorite household chore because it seems to pile up faster than I can take care of it.  With each child we added to our family, I got more and more behind and couldn't seem to catch up.  The couch was constantly hidden under a pile of laundry, and I spent a lot of time digging through the piles trying to find a shirt for someone or matching socks for someone else.

Finally, about two months ago, I put together a system for doing laundry.  Since then, I've been behind on laundry one time for a few days, and that was only because we were gone a lot one week.  That is absolutely nothing short of a miracle.


First, I divided up our laundry into categories:
  • Towels
  • Kids' clothes
  • Adult clothes
  • Hubby's farm clothes (which have to be washed separately because of the lovely hog smell.)  

Next, I assigned each category to a day of the week:

Monday: Wash Hubby's farm clothes
Tuesday: Wash towels
Wednesday: Kids' clothes
Thursday: Mine and Hubby's clothes 

This gives me Friday and the whole weekend off from the pressure of doing laundry.  If we're gone all day and I don't get a chance to do that day's laundry, I can simply move it over to a free day and stay caught up.

The key to making this schedule work is folding and putting away the clothes right away instead of dumping it all out on the couch to worry about later. 

I've also found it's easier to stay caught up on folding and putting away laundry when I'm just doing one category a day.  I used to tackle 6-8 loads in one day, and it was completely overwhelming to stay on top of folding and putting it all away.  When you're not behind on the laundry already, folding and putting away 1 or 2 loads is not a big deal.  That used to be my biggest problem, but now it's not an issue because I'm staying caught up.

Is laundry an ongoing issue for you or have you found any tricks to help you stay on top of it?  I'd love to hear how you handle laundry at your house!  


Wednesday, November 27, 2013

How To Make Your Own Board Book

When my older sister and I were kids, my mom helped us make a special board book for our younger sister's birthday one year.  We cut out pictures in magazines, glued them to cardboard, and decorated the blank space around the pictures.  Our mom assembled our decorated pages into a board book that was much loved by my little sister for years.  I actually have the book now and my kids love looking through it too.


For Little Man's third birthday, I threw a "Brown Bear, Brown Bear" Eric Carle themed party since he absolutely loves the book.  Since he's also obsessed with tractors, I decided to create a special book for him that included his love for the book, Brown Bear, Brown Bear, What Do You See with farming. 

First, I gathered my supplies.

Cardboard: I used cardboard-not the heavy corrugated kind, but a cardboard that was just a little heavier than that used in a cereal box.  You can use a cereal box too, just glue together 2 layer of cardboard for each page instead of decorating both sides.  That will make it thicker and more heavy duty.

Ziploc Bags: I bought the cheap brand of sandwich sized ziploc bags.  Regular ziploc bags have writing on them and you'll need plain ones so nothing covers up the pictures.

Plain baggies

Yarn: The yarn is used to hold the pages together.  Pick whatever color you want :)  You'll only need about a yard of it.

Paper, pencils, scissors, hole punch:  To give the book more of a clean look, I covered the cardboard with paper and because I'm lazy resourceful, I printed my pictures on large shipping labels so I could just peel and stick.  I used colored pencils to color my pictures because I was almost out of color ink for my printer and it was important that the colors were bright.

I spent several hours coloring all the pictures for the book.  It would have been much faster to buy a new color ink cartridge for my printer.

First, I cut my cardboard down to fit inside of the ziploc bags.  Make sure you test the cardboard to make sure it fits before decorating the cardboard so you don't have to cut any of the design off later.  Leave about 3/4" on the side of the cardboard nearest the opening of the bag so you can punch holes in the ziploc bag later.


I found my pictures using a google image search.  I copied and pasted them into a word document so I could manipulate the sizes to where I needed them, and then printed them in both half page sizes (to fit inside the ziploc bags) and in miniature sizes for the last page of the book. 

The miniature pictures for the last page in the book.

You can decorate your cardboard pages or the paper you'll be using to cover the cardboard however you'd like.  This make a perfect project for older siblings to do for younger ones, just like I made for my younger sister.

I hand-wrote the words for each page, but you could just as easily do that before printing it.  I traced my cardboard onto the paper so I would be sure to get it the right size when I cut it out.   


Glue the paper to the cardboard pages.  If you're using cereal boxes for the cardboard, glue two pieces together to make it thicker.  Slide the cardboard pages into the ziploc bags and seal them, making sure to get all the air out.  Stack the ziploc bags in the order you want them and flip through them to be sure all the pages are right.

One bag at a time, punch two holes in each ziploc bag, about 1 1/2" from the top and bottom.  Stack the bags up again in the right order and thread the yarn through the top hole and then the bottom hole.  Continue to go through the two holes four or five more times so the pages are tied securely together.  Tie a knot in the yarn, being sure to keep it tight.  To make it more decorative, you can also tie a small bow and double knot it so it doesn't come loose.

Finished!

Open to the first page

Little Man loves reading his book by himself.

Star loves the book too and can easily flip the pages by hersel.
 
If you're interested in making a farm/Eric Carle themed book like mine, here are the pages in order:

Green tractor, green tractor, what do you see?
     I see a brown horse looking at me.

Brown horse, brown horse, what do you see?
     I see a red barn looking at me.

Red barn, red barn, what do you see?
     I see a white sheep looking at me.

White sheep, white sheep, what do you see?
     I see yellow corn looking at me.

Yellow corn, yellow corn, what do you see?
     I see a black cow looking at me.

Black cow, black cow, what do you see?
     I see a blue truck looking at me.

Blue truck, blue truck, what do you see?
     I see a pink pig looking at me.

Pink pig, pink pig, what do you see?
     I see a gray silo looking at me.

Gray silo, gray silo, what do you see?
     I see a farmer looking at me.
      
Farmer, farmer, what do you see?
     I see a green tractor, a brown horse, a red barn, a white sheep, yellow corn, a black cow, a blue truck, a pink pig, and a gray silo looking at me.  That's what I see.


Saturday, August 31, 2013

Emilie Ruffle Onesie - FREE Pattern!

Ruffle butt onesies are one of my top sellers in my clothing shop.  They're super cute and quick to make!  The hardest part is lining up the ruffles on the backside of the onesie, but with a little practice that gets easier.


So how would you like a pattern for ruffle butt onesies...for FREE?


The pattern includes 9 pages of detailed, step-by-step instructions and measurements for adding ruffles and an applique to a purchased onesie. Sizes Newborn through 18-24 Months are included.

Just click on this link to download your free pattern.


I'd love to see pictures of your creations!  You can share them on the Little Owl Patterns Facebook page.


Happy sewing!

Check out more patterns from Little Owl Patterns here.


Friday, August 23, 2013

Commenting Tips for Bloggers and Blog Readers

I love getting comments on my blog.  It lets me know that someone out there is actually reading what I have to say, and I love getting to know my awesome readers.  I try to reply to every comment although I do miss some here or there.  Because most people aren't going to remember to come back to the blog post and check for a reply, I also email them my response by hitting reply on the email that blogger sends me with the comment.  Unfortunately, some people won't ever receive my email because they don't have an email associated with their blogger account.  When I get a comment from those people, the email from blogger replies back to "noreply-comment@blogger.com."  :(

Here are some tips on blog commenting for both bloggers and blog readers.  Basically, if you're reading this, than it's for you, whether you write a blog or not :)  


Tips for blog readers: 
If you read something you like (here or on any other blog) let the author know!  Comment, like the post on Facebook, etc.  It really means a lot to bloggers.  And I think it goes without saying that if you read something you don't like and feel a need to comment on it, just make sure you're respectful in your comment.  Bloggers are people with feelings too!  And FYI, I have awesome readers because none of the comments I've ever received have ever been anything but positive.  :) 

Check to see if you're a no-reply blogger and if you are, please fix it so I (and other bloggers) can respond to your comments!!  Here's a great tutorial from Story of My Life on how to do that.


Tips for bloggers:
Reply to comments!!!  There are some blogs I love reading and commenting on, but after dozens of comments and not a hint of a reply, I'll give up and stop commenting and sometimes even stop reading the blog because it feels like the blogger really doesn't care about his or her readers.  Let your readers know that they matter.  If you're not sure how to receive email notifications of comments, go to "settings" on your blog dashboard, then go to "Mobile and Email" and then fill out the "Comment Notification Email" box. 

Comment on other blogs frequently.  Not only is that simply a nice thing to do, but it also is a great way to build your blog readership and meet other bloggers.  Make sure that you're not a no-reply blogger!

I have two words for you...word verification (also know as captcha).  People are a lot less likely to comment on your blog if you require them to squint at a little box with nearly indecipherable letters and/or numbers and then translate that into another box.  To disable this feature on your blog, go to "Settings," then "Posts and Comments."  Where is says "Show word verification, click NO.


Make sure you read the comments for more tips and advice!

Do you have any tips to add?  


Thursday, May 9, 2013

How to Keep Kids From Using Too Much Toilet Paper


Kids (and some adults) are notorious for using too much toilet paper.  More than once, I've caught Princess happily unrolling about 2 yards of toilet paper for one wipe.  That's kind of a money waster.

To save money on toilet paper, I could do what this lady did and switch to reusable toilet paper aka family cloth.  But since that idea appeals to me about as much as sticking a screwdriver in my ear, I thought I'd go a different route.
.
.
.


Sunday, April 21, 2013

How To Make Your Blog Post "Pinnable"

Pinterest, blogging, business, tutorial


If you're like me, you have a "pin it" button installed on your toolbar and you aren't afraid to use it...liberally (at last check, I had over 4000 pins on my 48 Pinterest boards).  However, not everyone has that button installed or maybe they just need a little nudge to pin something from your blog.

Here's how to make your blog post "pinnable."

First write your blog post, complete with pictures (you can't pin words!), and publish it.  Now before you start promoting it on your Facebook page or Twitter (you do have those, right? Because they're awesome and free ways to promote your blog!) open your blog post like you're going to read it, and then open the Button and Widget Builder page on Pinterest in another tab.  Select the "Pin It Button."  Under Button Type, select "One Image."
Copy and paste the URL of your blog post into the first space.  
Click on the picture in your post that you want readers to pin so it opens up in the window by itself.  Copy and paste the URL of the image into the second space where it says "image."  Finally, add a description of your pin (Examples: Awesome giveaway at Awesome Giveaways Blog, How to host an awesome giveaway on your blog,)  Click on the red button that says "Build It!" and scroll down to copy your html code.
  
Next, open your blog post back up to edit it.  You do not need to be in HTML format to add the code.  Paste the html code right below the image you just built a pin for or wherever you want the button to go in your post.  Publish your post and you're done!

I decided to put the html code right below my picture so the Pin It Button shows up directly below it.

Now, if you want to create a hover button (for an example, hover over any of the pictures in this post!) on the images themselves, go back to the Buttons and Widgets Builder page on Pinterest.  Select the "Pin It Button" and then select the option that says "Image Hover" for the button type and click "Build It."  Copy and paste the html code onto the very bottom of your blog post.  Once again, you do not need to be in HTML format to add the code.  You probably want the description on the pins to be filled in for people which is helpful because sometimes people just hit the period and call it good enough which makes it harder for your pin to be repinned and found on Pinterest.  Click on the image in your post while you're editing and click on "Properties."


Under "Title Text," fill in the description just like you would for a pin.  Hit publish and admire your work!  

Thanks so much for visiting Supermommy!...Or Not.  I'd love for you to like me on facebook" and follow me on Twitter!  


Saturday, April 13, 2013

Why Is It So Expensive?

I've heard some complaints and comments lately about how expensive handmade children's clothing is. 

Honestly, before I started sewing, I thought the same thing.  Now, I realize that most seamstresses are actually underselling their creations.

Let's figure out why handmade clothing is priced as high as it is.

Here's a dress I made last summer: 

pricing crafts, why is handmade so expensive


 The materials that went into it are: 2 buttons, heat n' bond for the applique, thread, and approximately 2 yards of fabric.  The fabric I buy for my products averages out at $10-$11 a yard.  Yes, I could just go to Walmart and buy $6 a yard fabric, but I take pride in the quality of my product.  From my experience, you get what you pay for with fabric.  So, the cost of materials for the dress are $1.50 (buttons), $0.25 (heat n' bond), $0.15 (thread), and $20 (fabric) making the total cost for materials add up to $21.90.

Okay, now add in the time it took to make the dress...I spent approximately 2 1/2 hours from start to finish.  My time is valuable, and I deserve to be paid for it just like anyone else who has a job.  Let's say that I pay myself $10 an hour.  (Note: Can you live on $10 an hour?  Not very comfortably!)  That makes the total for labor costs $25.

$21.90 + $25 = $46.90

But we're not done yet!  This figure doesn't include all the hidden costs of business such as buying patterns and business cards, internet costs, time spent promoting the business and updating listings online, sewing machine maintenance, packaging supplies, Etsy and Paypal fees, time to take and edit pictures of the product, camera batteries, electricity to run the computer and sewing machine, etc.  To figure all that in, add at least $5 to the total above.

$46.90 + $5 = $51.90 

Want to know how much I'm selling this dress for?

$35

Still think it's overpriced?  When you take away the cost of materials, I'm not even making minimum wage.


Many of my friends and family assume that, because I'm a seamstress, I save money by sewing all of my kids' clothes instead of buying them at a store.  They're always surprised when I tell them that it's much cheaper and faster for me to buy clothes at Target or Old Navy than to make them myself.   


So, if I make so little money sewing and selling children's clothing, why do I do it?

Because I love it.  There's no way I could put this much time and energy into something that pays so little if I didn't love it.

So the next time you're browsing a craft show or Etsy and find yourself thinking that a designer is charging too much, please remember what goes into each handmade craft and piece of clothing.  


Thanks so much for visiting Supermommy!...Or Not.  I'd love for you to like me on facebook" and follow me on Twitter
 

Wednesday, March 6, 2013

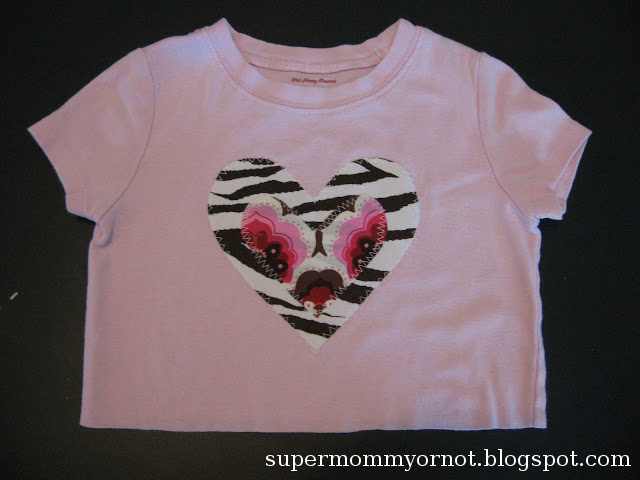
How to Applique

Applique sounds kind of scary, but it's actually really easy! If you haven't appliqued before or are a beginning seamstress, it's best to start with shapes that have straight lines such as a star or block.  A little practice and you'll be moving onto more complicated shapes in no time at all.  I found it to be helpful to practice sewing curves on scrap material.

Gather your supplies: A scrap of fabric, scissors, Wonder Under Lite (or another type of lite heat n' bond), iron, and ironing board

Start by decided what shape (or letter, number, etc) you want to applique.  Freehand or trace the shape onto a piece of cardstock and cut it out.   

Cut out a piece of fabric big enough for the applique (perfect way to use up scraps!) and iron it flat.  Cut out a piece of Wonder Under that's the same size as the fabric.  Using the directions on the package, iron the Wonder Under onto the backside of the fabric.  Trace the applique shape onto the paper backing of the Wonder Under and cut it out.  If the shape is directional (i.e. a number or letter), make sure to trace it mirror image!  I've had to redo many appliques because I forgot to flip the cardstock over before tracing.


Peel the paper backing off of the shape and, using the package directions, iron it onto whatever you are appliquing.  Make sure that it's placed exactly where you want it before ironing it in place.

I usually use a zig zag stitch, but if you don't mind a little fraying around the edges, you can also use a straight stitch to secure the applique.   Sew all the way around the applique, stopping to lift the foot and turn the fabric as needed.  Sew a couple of straight stitches at the beginning and end to secure the stitching.  
 

Finished!


Thanks so much for visiting Supermommy!...Or Not.  Please take a moment to "like" me on facebook" and follow me on Twitter

Monday, August 13, 2012

How To Ship Using Paypal

I used to handwrite all the addresses on my packages, lug them to the post office, stand in line, and mail them there.


Until I discovered Paypal shipping.  I wish I'd known about it two years earlier when I started selling online as it would've saved me a ton of time and money.

The only things you need to ship through Paypal are a printer and scale.  If the high cost of printer ink scares you, like it did me, read this for how to save money on ink cartridges.  I got my scale on Ebay for a good price, but you could also get a kitchen scale at Walmart if you wanted to. 

It's also helpful to have stick-on shipping labels (so much easier than taping the labels on!) and poly or bubble mailers.  You can purchase both of those on Ebay or Amazon at good prices.  I've also seen shipping labels and bubble mailers at Walmart, but they are more expensive.

The first thing you'll need to do is log into your Paypal account.  Find the transaction for whatever it is you're shipping.  If the payment wasn't made through Paypal, you can still print a label by going here.  You'll just need the customer's name and address for that.  

Clicking on "Payments Received" will narrow down the search if you have a lot of transactions.  You can also do a search from that screen with several different options if you're having a hard time finding it.


Next click on "Print shipping label" next to the transaction.  After you're done creating the shipping label, you'll be able to track the order in the mail.


Your address and the customer's address will already be filled in so all you have to do is select the service type, package size, and fill in the weight of the package.  If you won't be making it to the post office on the same day you print the label, be sure to change mailing date.  When you have all the information filled in, click "Continue" at the bottom of the screen.  The next screen will confirm your purchase of the shipping label and print it for you. 


Before you print your label, you may want to change your printer settings so it doesn't print a receipt as well.  You'll receive an email receipt so a paper receipt is optional.  Just keep in mind that if you do decide to print a receipt, it will take up a whole sheet of paper or 2 shipping labels instead of just half a sheet of paper or 1 shipping label. 

You can change the receipt settings by clicking on "Edit printer settings" under the Printer section.  Uncheck the box that says "Print receipt"

And you're done!  You can either arrange for your mailman to pick up your packages or drop it off at the post office.  The best part of it is that the shipping is cheaper when you purchase it online and when you ship First Class Parcel or Priority mail, delivery confirmation is free, otherwise it's $0.19.  When I shipped at the Post Office, I paid $0.70 per package for delivery confirmation. 


Thanks so much for visiting Supermommy!...Or Not.  Please take a moment to "like" me on facebook"!


Related Posts Plugin for WordPress, Blogger...