WE'VE MOVED!! You can now find us at Sunshine and Spoons!

Showing posts with label sewing. Show all posts

Monday, August 25, 2014

Random Monday - August 24, 2014

Princess after stepping outside: "It's so hot out here, I feel like I'm going to die to death!"
 
My older sister is a Whovian and let my kids watch some Doctor Who episodes at her house a few weeks ago which turned Princess into a budding Whovian as well.  While out shopping last week, Princess saw a blue port-a-potty and got excited..."Mommy, look!  It's just like Doctor Who's house!" which then led to a conversation about how my sister's house is just like the Tardis as well because "it's little on the outside except that it's little on the inside too."  Ha!
 
Princess: "You're the best mommy ever today!"
Me: "Thank you!  What about yesterday?"
Princess *thinks for a minute*: "No, not so much yesterday."
Thanks for the honesty, sweetheart!
 
Want baby fever?  Watch this:
 You're welcome :)
 
I got a copy of "All-of-a-Kind Family" by Sydney Taylor from the library.  It was one of my favorite books as a child, and I'm excited to be able to read it to Princess.

I've been desperate to get back to crafting, but thanks to some flooding in the basement last month, the floor in my sewing room needs to be re-done (which we're pretty sure will cost money) which means that I can't unpack my sewing supplies for a while yet.  Plus, Little Dude doesn't give me much time to dedicate to that sort of thing.  Sooooo, I've come up with some crafting I can do without my sewing machine.  Stay tuned in the next few weeks for the big debut!

I'm trying to teach Little Dude to fall asleep on his own.  And by "on his own", I mean, without me fighting/rocking him for an hour and with the pacifier, blanket, vibrating singing elephant, sound machine, infant swing, and any other sleep aid I can throw at him.  Wish me luck. 

Monday, July 29, 2013

Random Monday-July 29, 2013

I got behind on my cleaning.  Way, way behind.  I hate it when that happens because I can't work efficiently because of the mess plus I feel guilty for not cleaning, but I can't clean because I know I need to work.  It's a vicious cycle that ends with me sitting on the couch watching reruns on Netflix and devouring chocolate.

I wrote about an awesome way to keep my house clean almost 2 years ago and I still believe that it's the only method to keep me sane.  However, I didn't feel like I could pick it up again because my house was so messy.  However, I forgot some of the most important Flylady rules...

“Your home did not get dirty in one day, and it will not get clean in a day either.”

"Don't try to catch up.  Jump in where you are!" 

Oh, yeah.  Those rules.

So today, I jumped in with the daily routine.  Instead of a quick clean of each room, I set the timer for 10 minutes and spent just that much time in each room.  They aren't done, but they're better and I'll do the same tomorrow and the day after and the day after until they're ready for the quick clean again.


I did manage to get a little work done last week though.  I had a custom order for this fun back-to-school outfit for a sweet little girl who's starting kindergarten this year.  I loved it so much that I decided to offer it in my Etsy shop as well.  The skirt has a fun buses and stop signs print on the main portion and a handwriting fabric on the border.  The shirt has a heart shaped applique that can be personalized with your child's name or left blank so your child can write their own name on instead (which I think would make it an awesome keepsake first-day-of-school outfit!)  

I'm thinking Princess needs one of these for her first day of kindergarten as well.


Monday, July 22, 2013

Random Monday-July 22, 2013

Last week, I got my kids dressed for storyhour.  Then I realized that the two older kids were wearing these matching John Deere outfits I'd made them last summer.

Photo by the very talented Diane H Photography

Then, I realized that the baby didn't have an outfit that matched and Mommy Guilt set in so I decided to just whip up a John Deere bubble romper for her to wear to storyhour that morning.  So, 40 minutes before we had to leave, I was cutting fabric and sewing like a crazy person (which is how I usually sew, but it was even worse this time).  I got it done.  I didn't have a pattern so I winged it which is a terrible idea when you're trying to work as fast as you can as it turned out a whole size too small for her.  But I squeezed her into it and all 3 of the kids looked adorable and matched for storyhour.

I took the two oldest kids on a shopping trip to The Big City last week.  I left the baby at home with my older sister because it was stinkin' hot and there was a heat advisory in effect.  I tried to leave Little Man there too as he's very sensitive to the heat, but the wailing and gnashing of teeth and "But Mommy, I want to be with you! You're my favorite!" changed my mind.  One store into the shopping trip (we had at least 4 more to hit up before we were done) and he was whining that he was done and wanted to go home.  *eye roll*

But even if it was incredibly hot and the kids were whiny, they did say and do some cute-ish/embarrassing things while we were out shopping.

Like on the way to The Big Ciy when Princess was telling me all about something we did when she was 3 that she still remembers.  I asked her how she remembered so much and she said, completely serious, "I have books in my head and that's how I remember."

Or when we were walking through JCPenney's and Little Man pointed at a mannequin wearing a bra and loudly exclaimed, "Mommy, you have one of those!"

Or when Princess wanted to come in the changing room with me when I tried on a shirt.  When I took off my shirt to put the new one on, she held the bag she was carrying in front of her face and said, "Yuck! I don't like your tummy."

Okay, that last one kind of hurt a little...

Star and Little Man have been battling a bad cough for the last week or so.  Star has barely eaten at all since a week ago Sunday because of it.  I decided to take the kids into the doctor today (because doctors love all those walk-in, last minute appointments on a Monday, right?).  Star has pneumonia and Little Man is close behind her.      

And just to prove that I don't live under a rock and in case you do, the royal baby and heir to the British throne was born today and is a boy.  I plan to drink tea and munch on biscuits while changing my baby's nappy tonight in celebration.


Monday, March 18, 2013

Random Monday-March 18th, 2013

About a month ago, Princess threw up on my bed, 5 minutes after I'd put clean sheets on it.  On Saturday night, I changed the sheets on her bed which is akin to wrestling an alligator since she has the top bunk.  The next morning, she threw up on her bed.  I'm seeing a pattern here...

I'm having Star's 6 month pictures taken on Thursday.  Be prepared for an overload of baby cuteness later this week.

Speaking of Star being 6 months old...HOW DID THAT HAPPEN?!?!?  I noticed that she's starting to outgrow the cradle by my bed and it makes me sad that I have to move her to the crib in the kids' room soon.  I'm not ready for my baby to be that big already.


I'm thinking of changing my kids' blog names to more realistic names.  Something just irks me about calling my oldest "Princess" like she's a puppy or a spoiled entitled child.  Their new names would probably be Katie, Nano, and Anna if I change them since those are spin-offs of their real names.  What do you think?  Yay or nay? 

This morning, Little Man put on his coat, hat, scarf, and boots and informed me that he was going to the store to buy chocolate cookies, vitamins, and pizza.  Mean mommy that I am, I refused to give him the car keys.

It has come to my attention that Easter is in less than 2 weeks and I haven't even started my kids' Easter outfits.  I've made their outfits the last 2 years in a row and would like to keep up the tradition as long as they will still wear mommy-made clothes.

Little Man's Easter outfit in 2011 - Picture by Studio A Photography

Princess's Easter dress in 2011
   
Easter outfits - 2012

Mega Stuf oreos...some may say it's overkill.  I say it's heaven.

Photo credit: The Impulsive Buy
 
This post is linked up at Not Inadequate.  Grab a button and link up too!


Random Monday


 Thanks so much for visiting Supermommy!...Or Not.  Please take a moment to "like" me on facebook" and follow me on Twitter!

Saturday, February 16, 2013

Big News!

Haha, not that kind of big news.  Remember, I just had a baby 4 months ago.

Because parenting three children, babysitting two more, subbing at the local library, taking Princess to preschool and violin lessons, taking all three to ECFE and storyhour, and running my online children's boutique is just not enough to keep me busy.

HA!

Anyways, this has been a dream of mine for a while, but I finally took the plunge and figured out all the stuff I needed to know to get it off the ground.


I opened a shop to sell PDF patterns for children's clothing and accessories.  Right now, there are only two patterns for sale in my shop, but I'm working on MANY more and plan to add 1-2 new ones a month from now on.

You can find Little Owl Patterns on Etsy and Facebook.    

Want to become a pattern tester for Little Owl Patterns?  Email me at littleowlpatterns@yahoo.com with the ages/sizes of your children and a few sample pictures of your sewing.  If you have a shop of your own, include a link to it.  I just might feature you on the blog!


Thanks so much for visiting Supermommy!...Or Not.  Please take a moment to "like" me on facebook"!

Thursday, October 11, 2012

31 Days-Organizing Sewing Patterns

It took me a while (over a year) to figure out the best way to store and organize my sewing patterns.  For the longest time, I just put all the different patterns and sizes in a pile, but then I'd lose a part of a pattern or it'd take me all day to dig through the pile to find the right ones for the orders I needed to start working on.

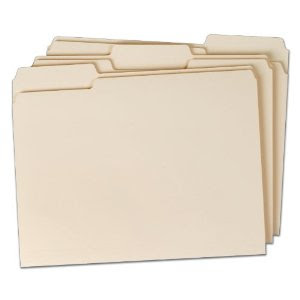
I finally came up with an effective, neat, organized way to store my printed patterns.  I start by taping the sides of a basic file folder together to form an envelope.

Letter sized file folders

Then I write the pattern and the size on the tab on the top of the "envelope" and fold the pattern pieces to fit inside.  I have the new file folder from 31 Gifts on my wish list to store the folders in, but for now, I'm using an empty baby wipes cardboard box since the folders fit so perfectly.   


Because it helps me find what I'm looking for faster (and because I'm a little OCD about organization), I file the patterns alphabetically, and then each pattern is filed by size.  It takes me just a few seconds to pull out the pattern I need.  


In the back of the box, behind all the patterns, I keep a green folder I saved from college.  In it are all the basic instructions and sizing guides for each pattern type, with each pattern stapled together. 


I also keep a folder on my computer with all the pattern pdfs and copy them to a USB stick drive as well.  I'd hate to lose them if my computer goes down!  

How do you store your sewing patterns?

Want to see a complete list of the posts in the 31 Days to Simplify Your Life series?  Click here


Thanks so much for visiting Supermommy!...Or Not.  Please take a moment to "like" me on facebook"!  

Sunday, September 23, 2012

New Baby Things

Since I didn't really learn how to sew until after Princess and Little Man were born, I never got the chance to make baby stuff for them.  This time, I've been having fun making things for the new little guy (who at 41 weeks gestation has officially worn out his welcome in his little guesthouse!). 

Here are a few of the things I've made so far:

Terry cloth backed bib with an owl applique

Minky backed blanket

Flannel John Deere overalls

Baby blue minky beanie hat to keep that little head warm this winter!

Blue and brown owls beanie hat

Thanks so much for visiting Supermommy!...Or Not.  Please take a moment to "like" me on facebook"!

Monday, July 2, 2012

T-Shirt Dress Tutorial

P
rincess only has a few summer dresses that fit her right now and, since she insists on wearing a dress pretty much everyday, it's time to add some more to her wardrobe!


This shirt had a stain right on the front of it so it was either headed for the rag bag or my sewing machine.  I cut about 4 inches off the bottom of the shirt.  
 

After picking out some pretty fabrics to go with the shirt, I was ready to go.  I measured the bottom of the shirt and came up with 11" across.  I doubled that measurement for the width of the top tier of the skirt and then doubled that again for the width of the bottom tier.  I held the shirt up to my daughter and measured how long I wanted the skirt portion to be (14" long), added 2 inches for seam allowances (16") and divided that in half (8") for each skirt tier.  My final measurements were 8" x 22" for the top tier and 8" x 44" for the bottom.  I cut out two pieces from each fabric using the above measurements.


I needed to do something to cover up the stain on the front of the shirt so I decided to add a heart shaped applique.  I used Heat N' Bond Lite (can be purchased at Walmart).  If you prefer the no-sew method of applique, you could use the Heat N' Bond UltraHold.  I followed the directions on the package for making the heart shape on the fabric and ironing it on the shirt.  To make it even cuter, I decided to cut out one heart from each of the skirt fabrics and layer the smaller one on top of the other.


 I set my stitch selector to the zig-zag stitch (setting "C" on my machine) for the applique.


I zigzagged all the way around the two heart shapes, being sure to straight stitch backwards a few stitches at the beginning and end of each set of stitches so they would hold.  You may have to stop and readjust your fabric a few times when you're going around the curves.


The shirt is finished!  Time to assemble the skirt portion.


 I pinned the ends, right sides together, of each of the two skirt tiers.  I sewed a straight stitch about 1/4" from the edges to make two big loops of fabric.


 To prevent fraying, I set my stitch selector back to the zig zag stitch and zig zagged the edges, making sure my needle fell just off the edge of the fabric with each stitch. 


 Setting aside the top tier, I folded the bottom edge of the bottom tier (the bigger loop) over about 1/4" and then folded it over again.


All pinned and ready to go!  I sewed a straight stitch close to the upper edge of my fold to hem the skirt.  Next, I sewed a gathering stitch (go here for a tutorial on easy gathering) on the top of the fabric and pinned it to the bottom of the top tier, right sides together.  I sewed a straight stitch and then zig zagged the edges so they wouldn't fray.  Then, I sewed another gathering stitch on the top of the top tier that would be attached to the t-shirt.  


The last step was to attach the skirt to the t-shirt.  Keeping the skirt inside out and the t-shirt right side out, I slid the t-shirt, sleeves and collar down, inside the skirt and lined up the bottom raw edges of the t-shirt with the raw edges of the top of the skirt.


When you're done pinning the two pieces together, you won't be able to see the t-shirt.  I sewed them together with a straight stitch, being careful not to stretch the t-shirt, and then finished the edges with a zig zag stitch to prevent fraying. 

Not sure what's up with the cheesy grin.
And here's the finished dress!  Princess is in love with it!  She wore it to church yesterday and got a ton of compliments.

This dress is linked up with "The Dress Project: Summer Challenge" at Bits and Pieces From My Life


Thanks so much for visiting Supermommy!...Or Not.  Please take a moment to "like" me on facebook"!


Saturday, June 30, 2012

The Easiest Way to Gather Fabric


No, really.  This is the easiest way to do it.  I love ruffles, but I have always hated having to sit there and pull on the gathering thread to create the ruffles at just the right length.  This method requires very little adjusting to make perfect ruffles! 

Start by setting your stitch length as long as it will go.  Mine goes up to "4."

Next, set your upper thread tension as high as it will go.  My regular setting is "3", but when I gather fabric, I set it to "9."
 
This is the trick to really get your fabric to make great ruffles.  Using your thumb, create a gentle pressure on the spool of thread while you're sewing your gathering stitch.  Lighter fabrics will need barely any pressure, heavier fabrics will need more.   

Voila!  Beautiful, perfect gathers, ready for pinning!  You may have to adjust the gathers slightly depending on the length of the fabric you are pinning the ruffle to, but starting out with gathers like this makes it SO much easier!

Good: The traditional way of gathering.  Set your stitch length as high as it will go.  

Better: Set your stitch length and your upper thread tension as high as they will go.

Best: Set your stitch length and upper thread tension at the highest settings and apply pressure to the spool of thread with your thumb.

Thanks so much for visiting Supermommy!...Or Not.  Please take a moment to "like" me on facebook"!
Related Posts Plugin for WordPress, Blogger...